Iterating on the Ingredient Storage and Release Mechanism Design
- Owen Minnes

- Jan 30, 2021
- 3 min read
A critical component of the CookMate system is the mechanism by which it stores the ingredients for the user’s desired recipe, and then ultimately releases them into the cooking vessel at an appropriate time. Several constraints and criteria guide the design of this subsystem:
To satisfy the variety of meals which CookMate will be capable of producing, six ingredient containers are required – four of which have a minimum volume of 250mL for general ingredients and two of which have a minimum volume of 50mL for spice mixes.
According to recipe directions, ingredients must be capable of being individually released.
Ingredient storage containers should be removable for easy cleaning.
First Container Prototype
With constraints and criteria in mind, an initial design was developed which was to look like this.


This initial design featured the six required containers, and ingredient release was to be facilitated by making use of two stepper motors, one of which rotates the ‘carousel’ of containers, and the other which is used as a linear actuator to release the ingredients.
A prototype for the initial design was produced by 3D printing one of the six containers along with a latch. Here is a picture of that prototype.

This prototype worked to an extent, but it was not perfect, and several key takeaways were noted:
Printing a part of this size is expensive and time consuming – ideally, we should cut down on the amount of material.
With a lower-end 3D printer, dimension accuracy cannot be guaranteed, and clearances between parts should be refined to ensure a good fit.
Latch and container need to form a good seal to prevent leaking of ingredients.
Container Redesign
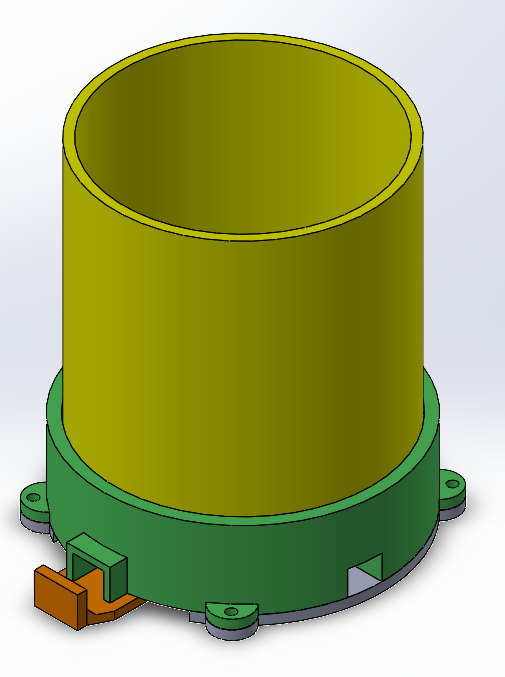
A redesign of the ingredient container was performed, considering the lessons learned with the original prototype. It was noted that a large portion of the container is simply a cylinder, which does not necessarily require additive manufacturing to be produced. For this reason, the redesigned container was made to be a hybrid between a 3D printed base, and a cut PVC pipe, available from a local hardware store. Another key change to the design was the incorporation of laser cut parts into the ‘carousel’. Laser cutting can be performed using acrylic and is cheap and highly accurate. Rather than 3D printing the entire body of the ‘carousel’, layers of laser cut acrylic were used. These layers were also useful in ensuring a good mate between the latch of the container and the container itself, replacing a 3D printed slot with a laser cut slot.
Check out the solid models for the redesigned container assembly below.


Putting it Together
One of the six containers was recently 3D printed, along with a housing for the two stepper motors. This was done to ensure a working container design prior to printing the other five. Additionally, the acrylic laser cutting was performed.
With parts and screws in hand, the assembly efforts were begun. See below for a photo of the assembly progress so far.


On initial testing, all components seem to be capable of being moved freely, and mating parts are well-secured.
Some other interesting features of the design can be noted:
Containers rotate about the vertical axis by means of a stepper motor to align with the dispensing location.
Three ‘door rollers’ were reshaped and fastened to the base plate to facilitate smooth rotation.
A lead screw stepper motor with a travelling nut is used to achieve linear actuation of latches. A laser cut ‘puller’ piece attaches to the travelling nut and slides along rails to pull back on the latch.
Two optical limit switches are used to ‘home’ each of the stepper motors.
The container assembly can be easily lifted from its base for cleaning.
What’s next?
Prior to completing the assembly, some testing will need to be performed by actuating the stepper motors and monitoring the limit switches. This may lead to a further iteration on one or more elements of the design.
Stay tuned for a future post with updates on the ingredient storage and release mechanism as well as a potential demo of it in action!


1 Comment